

How to Refill Epson T200 T252 T273 T277 Cartridges
- By BCH Technologies
- On Nov 15, 2018
- Comment 0
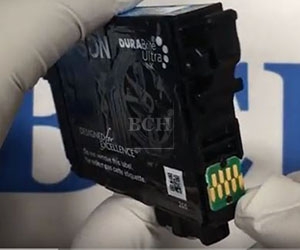
Today we are going to show you how to refill an Epson cartridge. Before we start, there is some homework to do. Let's get familiar with the cartridge. The printer stores the number of printed pages on a computer chip, which is at the front of a cartridge. Our first homework assignment is to learn how to reset the page number back to zero. Otherwise, the printer will not recognize the new ink level. Click here to learn: everything we need to know about resetters.
The second homework assignment is to figure out how to unclog the printer. We may be using new ink or even switching from pigment to dye ink. Furthermore, refill activity may introduce air bubbles which block the printhead. Knowing how to unclog the printhead is very useful, and there are many videos on how to unclog the printhead. We may add some videos later too. By the way, we have a special adapter to remove air bubbles out of a cartridge. But if a syringe is available, it is as effective as the adapter.
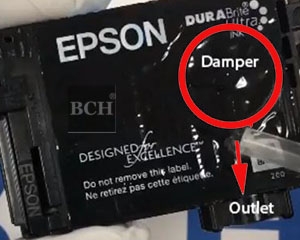
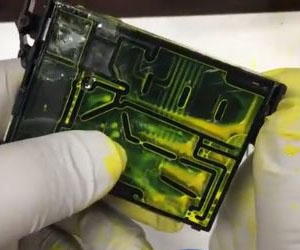
Let's take a closer look at the cartridge's design. On top of the ink outlet, we have something called the "one-way damper." This damper will make ink flow one way: from the cartridge to the outlet. If we try to inject ink from the outlet, it will not work.
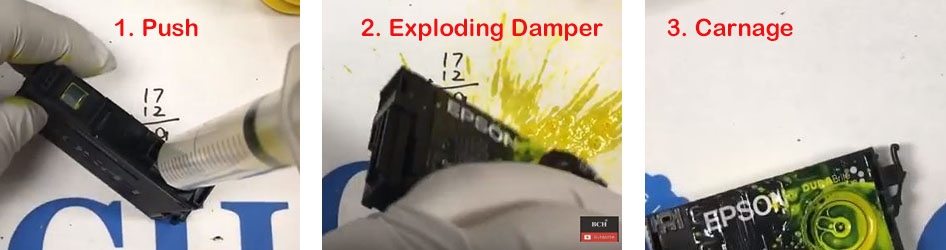
One of our competitors sells a refill tool for $200. They claim that the device will let you inject ink backward. After paying the money, they will send a 20 ml syringe. Then, they will tell us to push air through the outlet until the damper's membrane is fractured. We don't have a 20 ml syringe here, but we have a 10 ml syringe. We can offer this syringe for $100 if anybody is interested. Also, we have a bridge in Brooklyn for sale. We want to try this "membrane fracture" theory first. The result is a disaster: the one-way damper ruptured the cartridge casing and poped out.
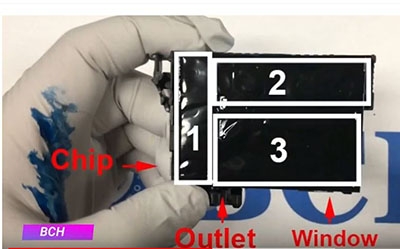
Okay, let's focus on non-violent refills. Our goal is to add ink to the cartridge. Inside, the cartridge is divided into many small chambers. Let us take off the cartridge cover. There are three main chambers. When you add ink to chamber two, it will flow to chamber one. However, the cartridge needs some ink in chamber three, so the printer can detect ink from the window.
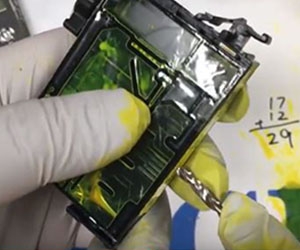
In this tutorial, we will take off the cover and also use a transparent cartridge to show the process. In real refill, we don't need to take off the cover or have a transparent cartridge. If anyone would like to make a transparent cartridge, he or she can follow our YouTube channel. By the way, we sell practice cartridges on our website too.
We can use any size drills. Small drill holes can be covered with a tape or hot glue. Epson has an air vent on top, so it is not airtight, and the seal doesn't need to be airtight either. We also sell three mm drills and plugs if anyone is interested. By the way, the green plug is the best for covering the three mm hole.

Next, we will inject ten ml of ink into the cartridge. If we have a squeezable bottle like this, you can add a third of it. We can see ink naturally flows from chamber two to chamber one. Now, we will use a thumb to put some pressure on chamber three, squeeze it a few times, and let ink come down and cover the window. By the way, the Epson cover is very soft, and we can squeeze it without any trouble.
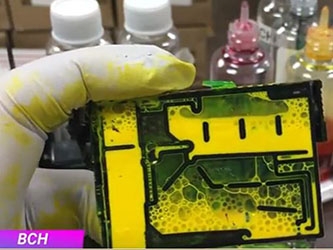
There may be concerns that chamber three is not full. This is okay. We will simulate the printing process. We will draw ink from the outlet and simulate the printer consuming ink. Chamber one's ink will begone first and then chamber two’s. Eventually, chamber three will be empty. Thus, we don't need to fill chamber three all the way.