

How to clean HP 950 933 Printhead (OfficeJet 8600, 8610, 8100, 8620)
- By BCH Technologies
- On Dec 26, 2017
- Comment 0
HP 950 printhead is relatively easy to maintain and clean. You can use hot water to replace the BCH Cleaning Solution for Pigment and Dye Ink in the instruction below.
For Professional Cleanings:
For Household Cleanings:
Method 1.
Use printer's built-in function. HP has three levels of cleaning. At the first level, HP will wipe the printhead clean. If the print is undesirable and you selected "continue", the printer will move to second and third cleaning level. At these levels, the printer will inflate and deflate an air bladder inside the cartridge. Ink will be squeezed out the cartridge and thus push clogs out of printhead.
To remove stubborn clogs, you can combine and alternate the levels of cleaning. Do not do too many cleanings in a row. You may flood the ink pad underneath. The excessive ink may form new clogs and make things worse. Give a little time for the clogs to soften and then run the cleaning after few hours.
Method 2.
Have a set of spent cartridges and fill them with water or cleaning fluid. You can find spent cartridges on eBay by searching for the cartridge model + "empty" keyword. The cartridge needs to be functional. If you have BCH's ARC chip, you can transfer the chip on to those cartridges. Put the cartridge in the printer and use the printer's cleaning routine. Again, use a combination of all three levels and give enough time in between.
Method 3.
Instead of using HP's built-in function, you can take the cartridge out and simulate the cleaning routine.
Warning:
Our friend FatrCat pointed out that this method should be used by professionals only. The method can easily over-pressurize the ink compartments just below the intakes and cause them to burst, as one side of these compartments is a very thin plastic film, and not a rigid plastic material like the exposed surfaces are. Because this particular method requires extreme delicacy, it should be done by professionals only.
Step One: Open printer lid, remove cartridges and pull up the handle on the right side of the printhead. Take the printhead out of the printer.
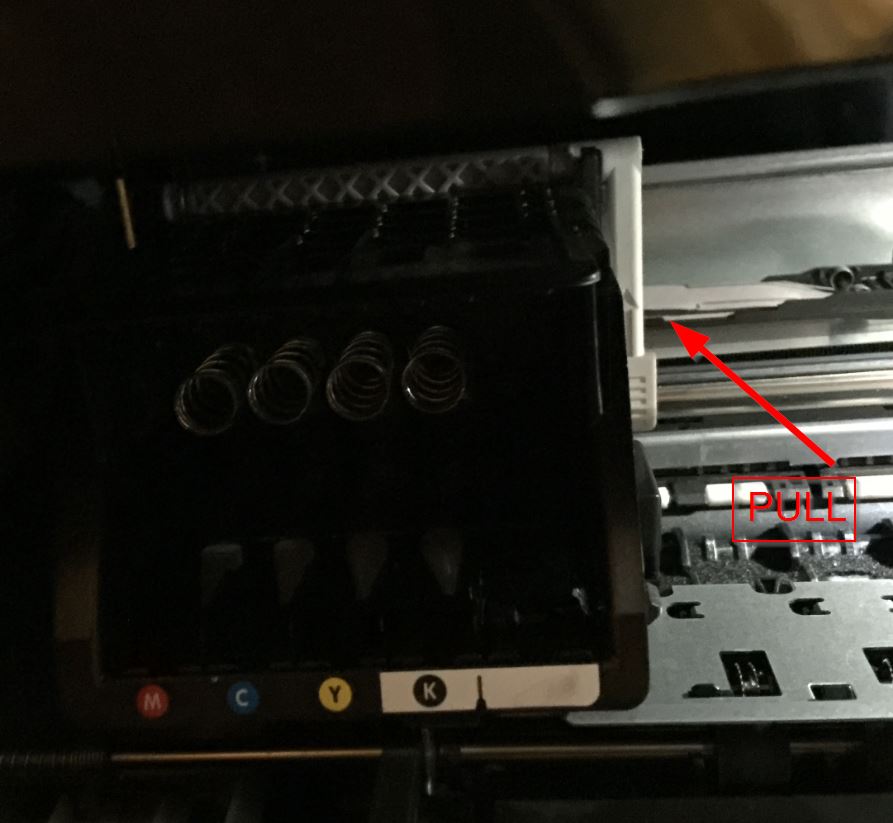
After removing the printhead, push the handle down and close the lid. Otherwise, the cartridge head cannot move because the handle blocks the passage.
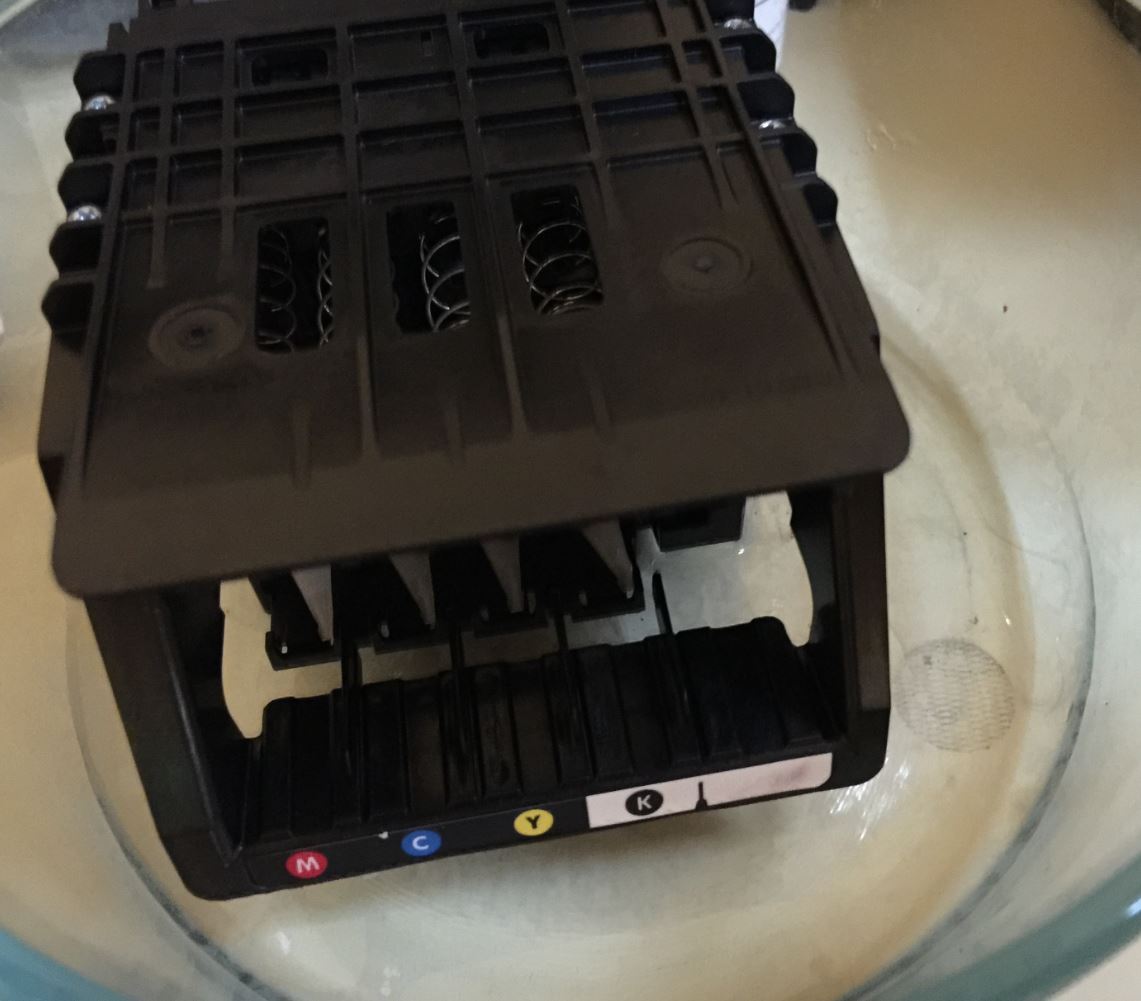
Step Two. Once you have the printhead in your hand, you can do one (or more) of following things:
1. Wash the bottom of printhead under hot water. The temperature of the household water will not be high enough to damage the printhead so that you can turn the water to the highest setting. Wash it for 2-5 minutes.

2. Fill a bowl with 1/2 to 1 inch of cleaning solution and soak the printhead for few hours
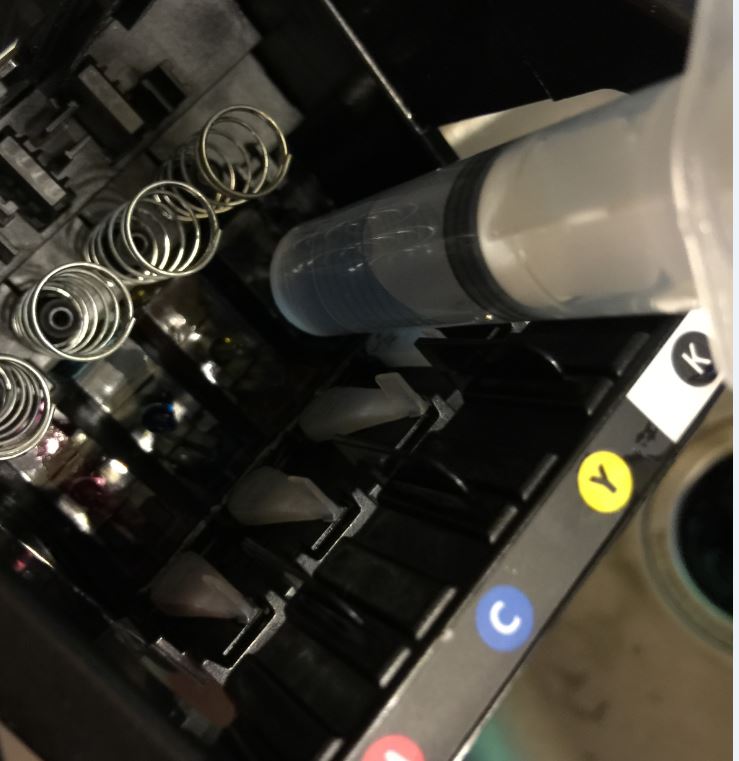
3. Use a syringe to flush the printhead with cleaning solution (or water). This procedure should be used only if previous two methods aren't working.
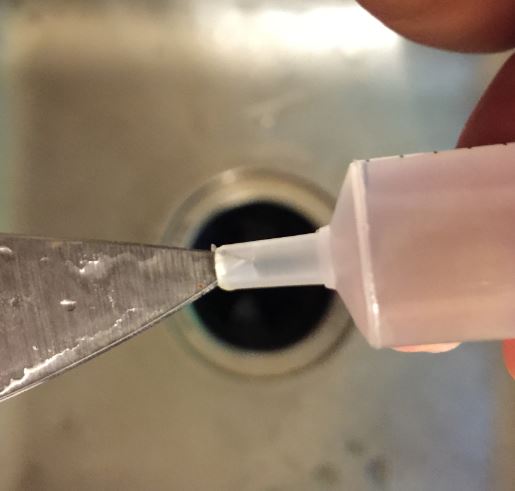
If your syringe's opening is not wide enough, you can use a knife tip to widen it slightly. Fill the syringe with fluid and push the liquid into each ink intake. The ink intake looks like transparent plastic needles, stick out from the base.
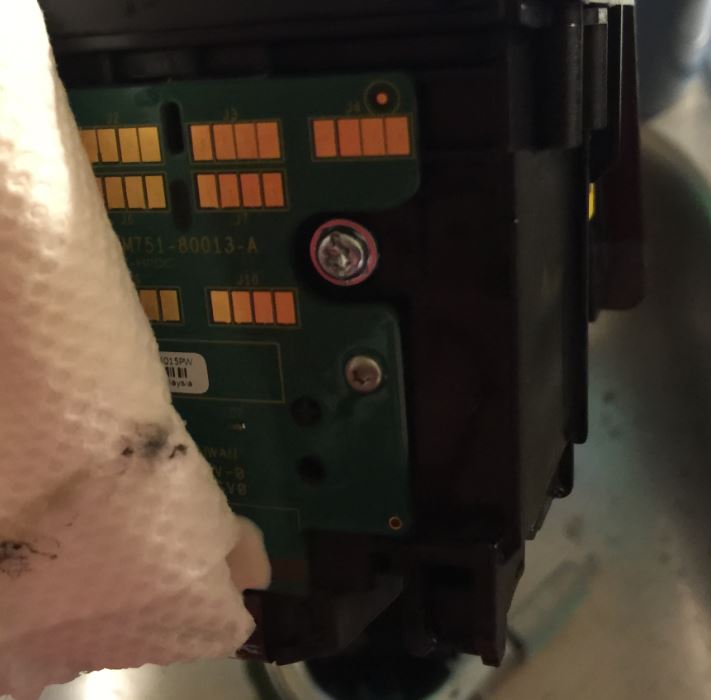
Step Three. Dry the circuit board with paper towels. Do not wipe the bottom of the printhead. Fibers from paper towel will block the micro-openings of the printhead which will damage the printhead permanently. Make sure you dry the circuit board completely otherwise your printer will think the printhead is damaged. It is okay to leave the bottom of printhead wet. You can use lint-free lens paper to dry the bottom.
Step Four. Run two printhead cleaning routines back-to-back and let the printer sit for about an hour and then repeat until all the colors come out naturally.